
How to Request Alternate Media in AIM
How to Request Alternate Media in AIM
- Access the AIM Portal.
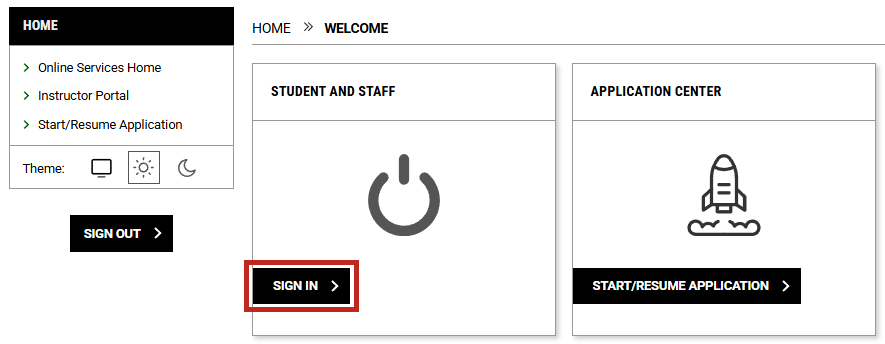
AIM Portal - Under the "Student and Staff" section, select the "Sign In" button.
NOTE: Make sure that you have requested the "Alternative Media" accommodation for the class that you wish to receive alternative media for. Follow the "How to Request Accommodations" guide.
- Under the section titled, "Accommodations" select the "Alternative Formats" option.
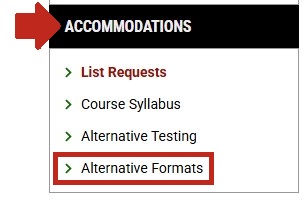
- This will take you to the "Alternative Formats" page.
Once you get to this page, make sure that you are viewing the correct semester.- This page is where you will find information regarding your alternative media requests and contains two main sections, "Request Summary" and "List Requests for Alternative Formats".
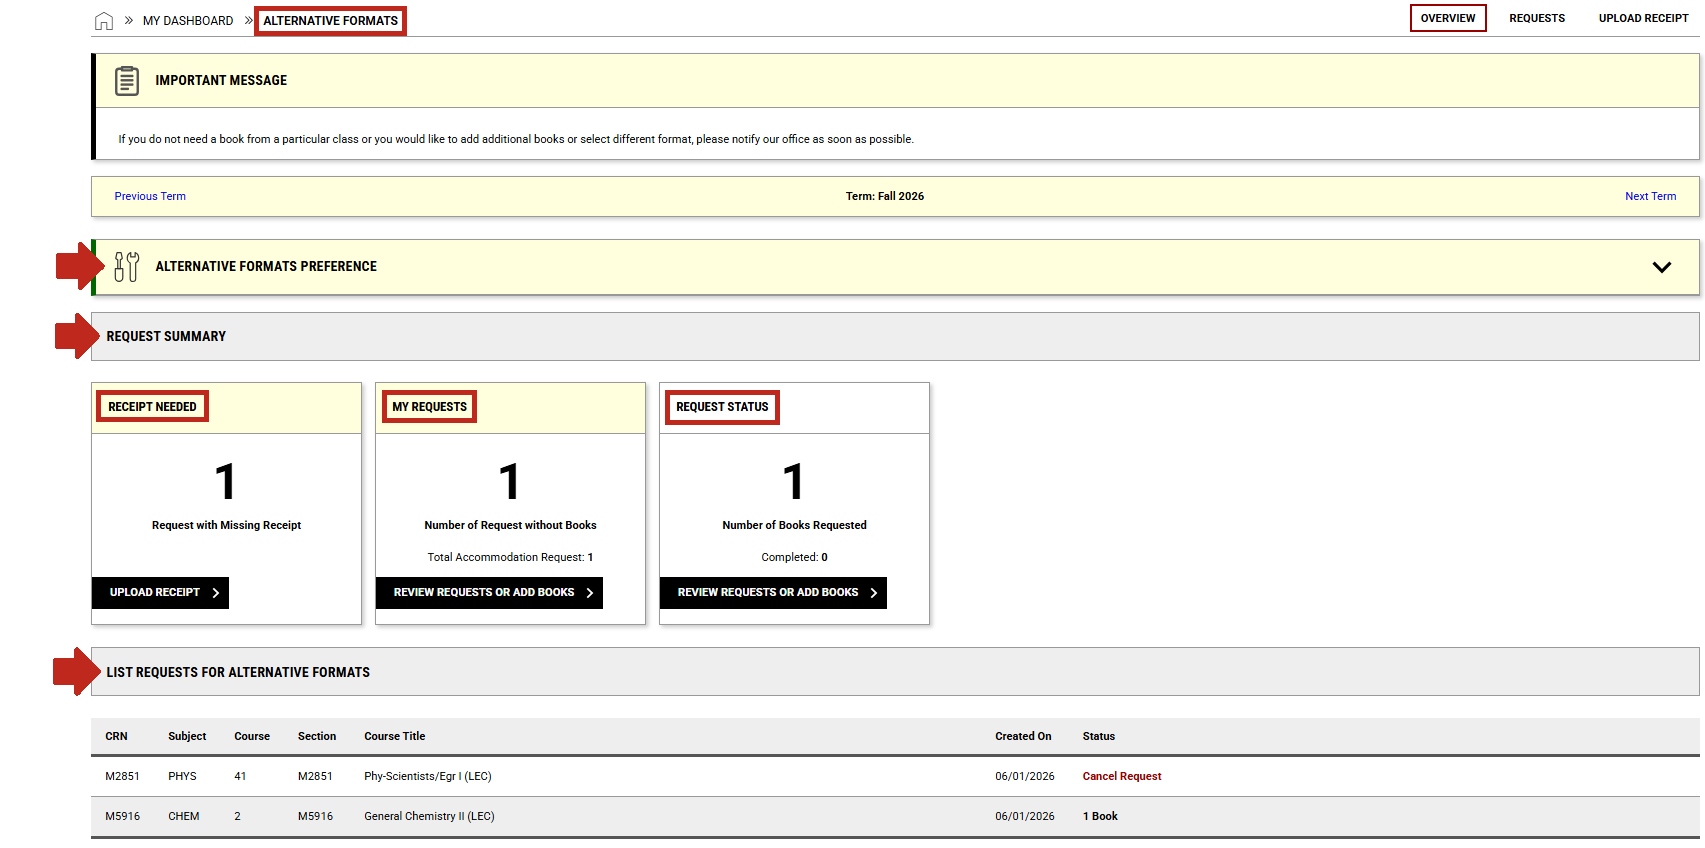
- Under the section titled, "Request Summary" there are three subsections.
- The "Receipt Needed" subsection shows you how many alternative format requests that you have that still require you to upload a receipt for your textbook(s).
- The "My Requests" subsection tells you how many requests for alternative media that you have made for the semester.
- The "Request Status" subsection tells you the status of your alternative media requests.
- Under the section titled, "List Requests for Alternative Formats" is a list of classes that you have requested alternative formats for, when you made the request, and the status of your requests.
- This page is where you will find information regarding your alternative media requests and contains two main sections, "Request Summary" and "List Requests for Alternative Formats".
How to Request a Textbook
- Under the "My Requests" subsection, click on the "Review Requests or Add Books" or you can also click on the "Requests" button in the upper right corner of the page.
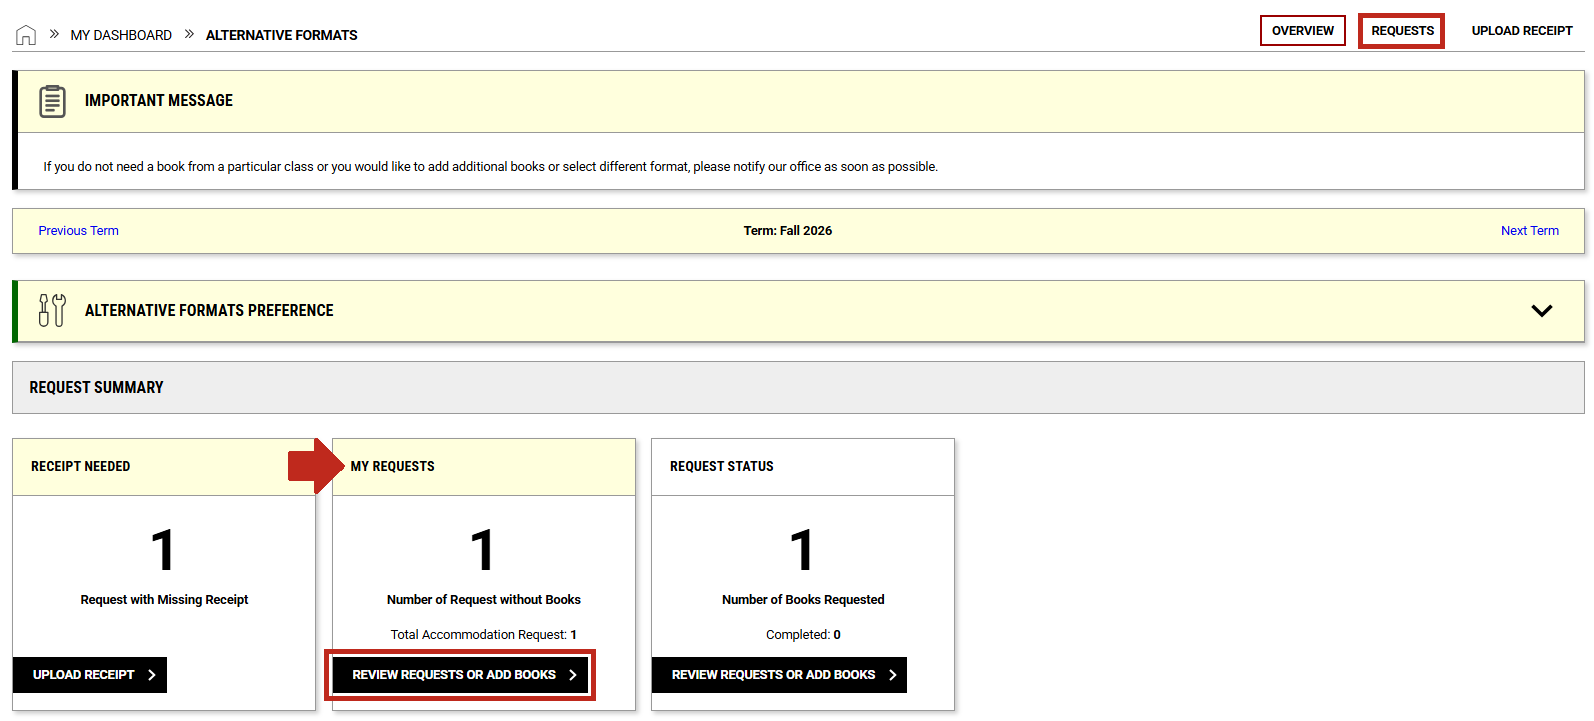
- This will take you to the "Alternative Formats -- Requests" page.
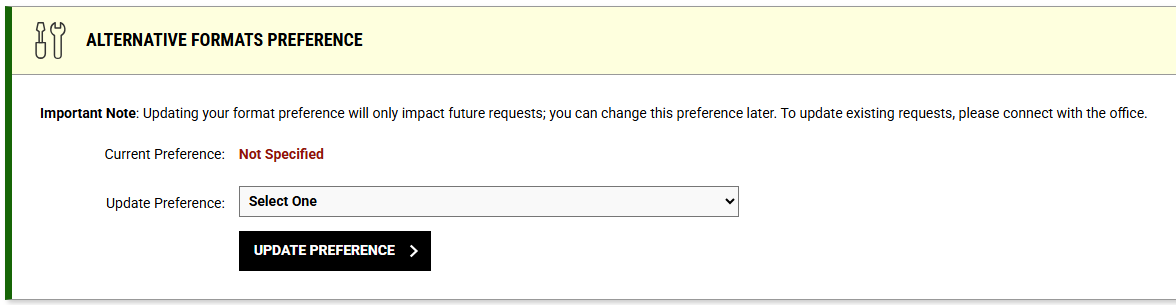
- The "Alternative Formats Preference" section is where you can update your preferred format for your books or reading materials.
- The standard format that DSPS offers is through the basic text-to-speech software with note taking capabilities called, Kurzweil 3000. If you are unable to use this software for any reason, please contact the DSPS office and schedule to meet with the Alternative Media Specialist.
- The standard format that DSPS offers is through the basic text-to-speech software with note taking capabilities called, Kurzweil 3000. If you are unable to use this software for any reason, please contact the DSPS office and schedule to meet with the Alternative Media Specialist.
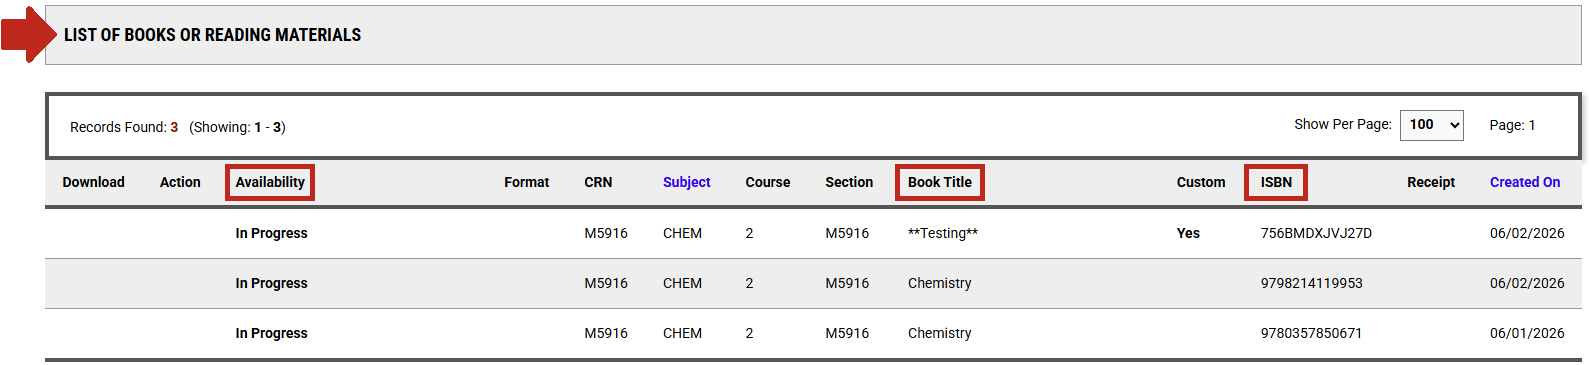
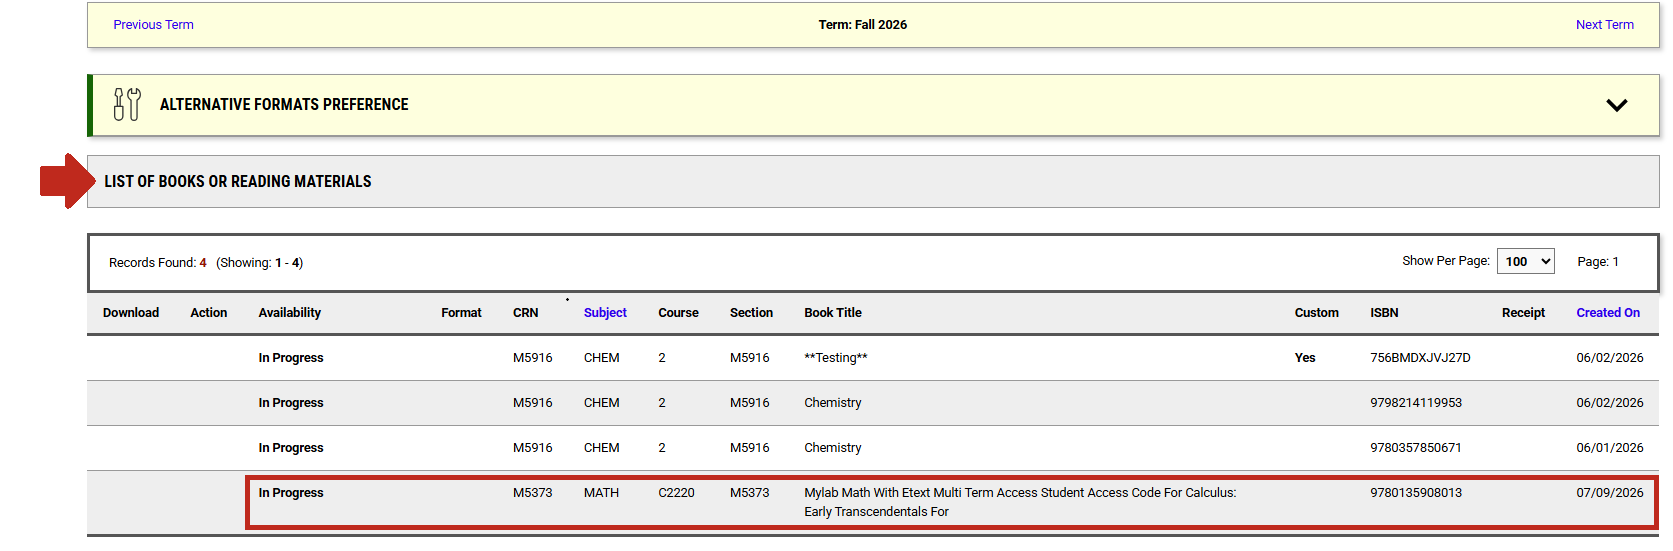
- Under the "List of Books or Reading Materials" section, it shows a list of the specific books or reading materials that you have requested with their availability.
- Under the "Request Alternative Formats" section, there is a list of books that match the classes that you have requested alternative formats for. The books on this list reflect the one(s) that the instructor for your class has listed as required through the bookstore.
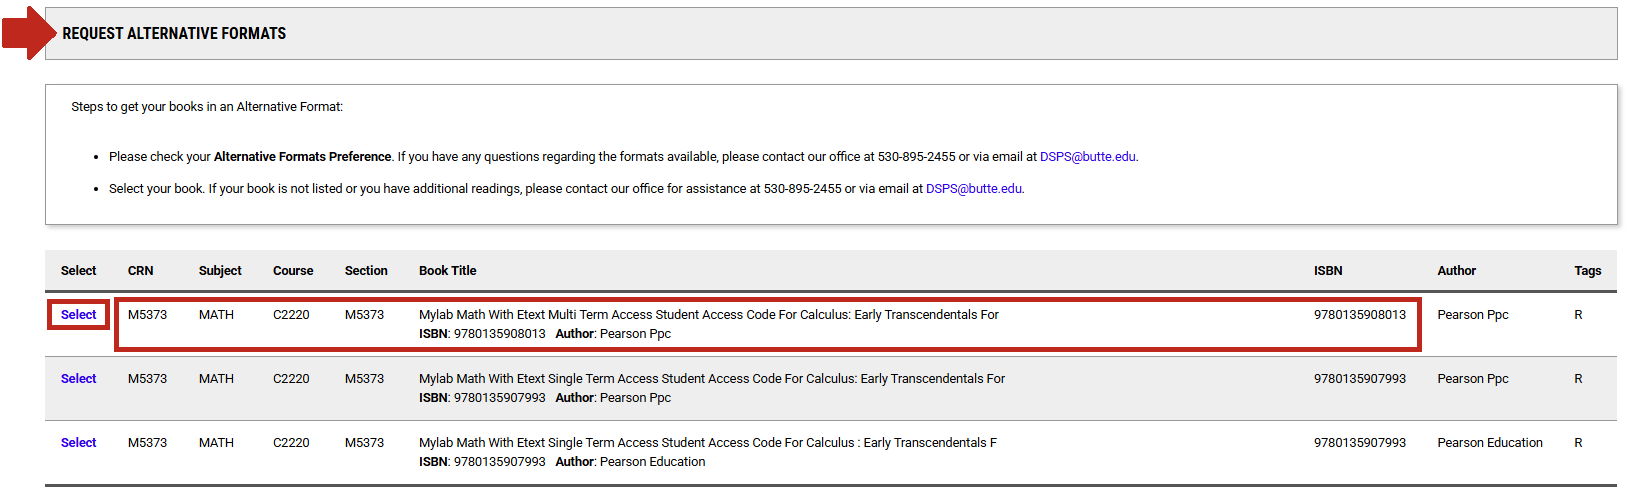 Clicking "Select" next to one of the options automatically requests that option for you and both a "Success! Your Action Has Been Completed" message will appear at the top of the page and your book will be added to the "List of Books or Reading Materials" section.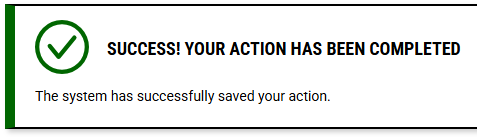
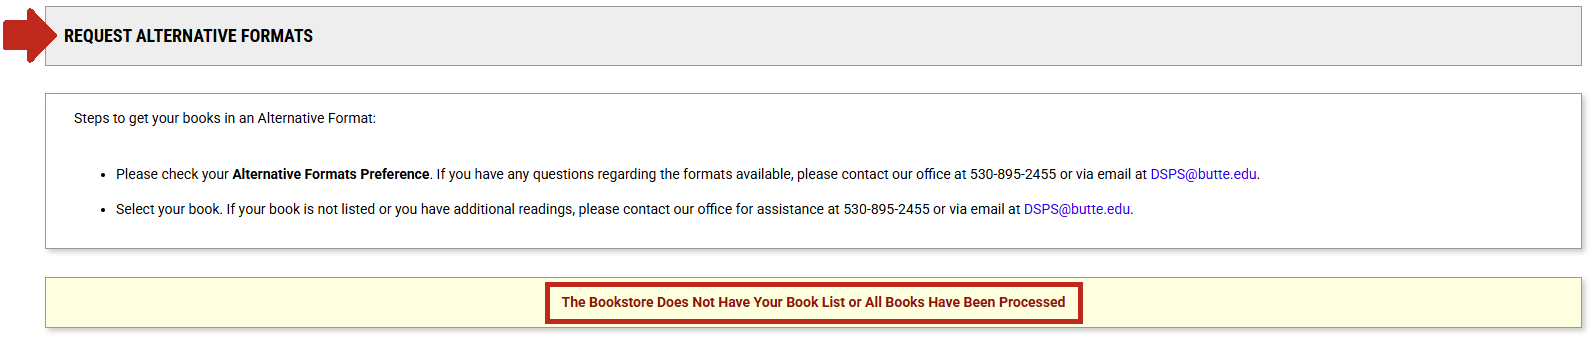
- If the message "The Bookstore Does Not Have Your Book List or All Books Have Been Processed" appears under the "Request Alternative Formats" list, continue to the next section.
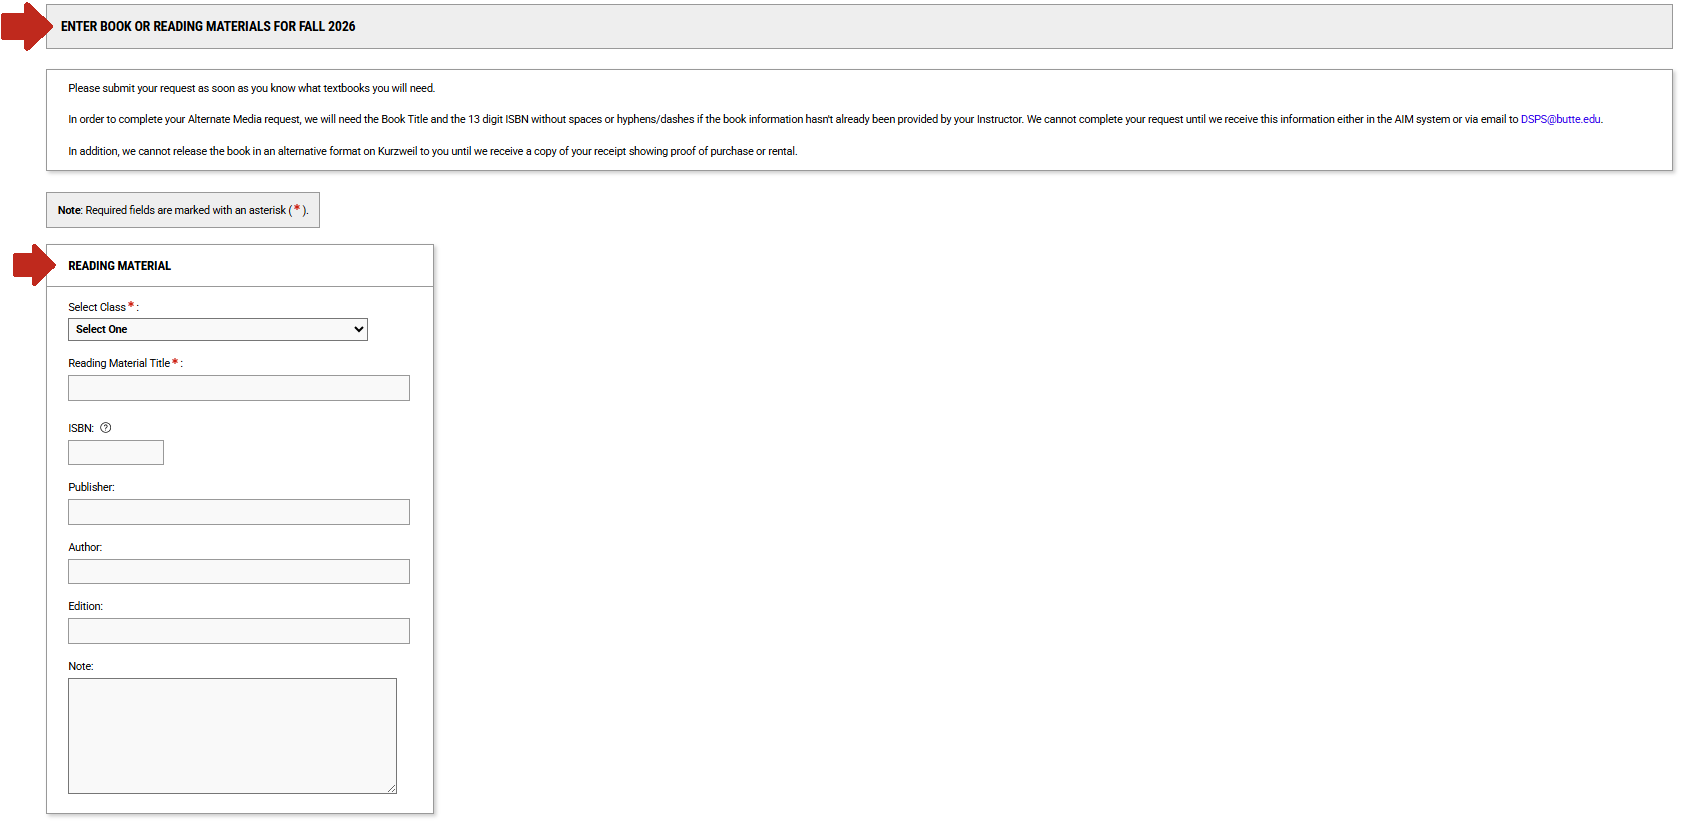
- Under the "Enter Book or Reading Materials For [...]" there is a subsection titled "Reading Material" where you can manually enter the information needed to request a book.
- Under the subsection titled "Reading Material" you will want to select the "Select Class:" drop-down menu and choose the class that you wish to request the book for, and under "Reading Material Title:" enter the title of the book or reading material.
NOTE: These are the only two pieces of information required. If you have additional information about the book or reading material, please continue to fill out the rest of the section.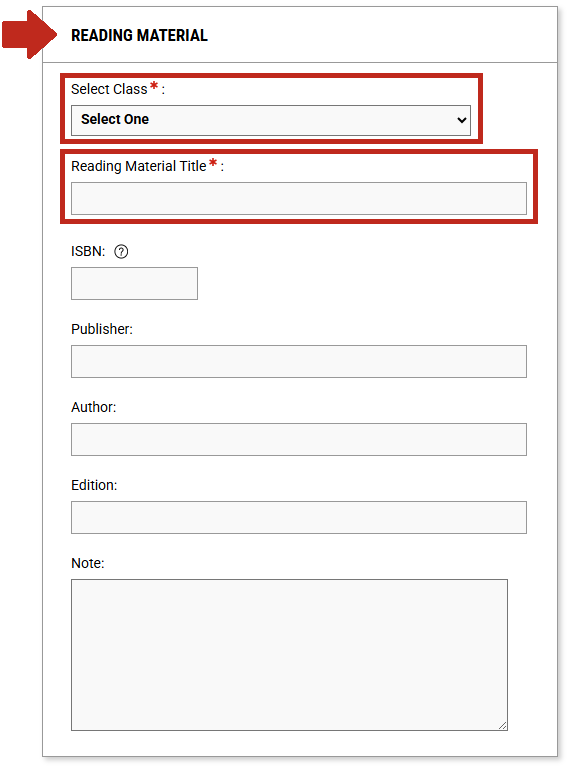
- Once you have finished filling out the "Reading Material" section and have reviewed it to ensure that everything is correct, click on the "Submit Request" button at the bottom of the page.
- After you click the "Submit Request" button, a "Success! Your Action Has Been Completed" message will appear at the top of the page and your book will be added to the "List of Books or Reading Materials" section.
- Under the subsection titled "Reading Material" you will want to select the "Select Class:" drop-down menu and choose the class that you wish to request the book for, and under "Reading Material Title:" enter the title of the book or reading material.
- The "Alternative Formats Preference" section is where you can update your preferred format for your books or reading materials.
How to Upload a Receipt
- Under the "Receipts Needed" subsection, click on the "Upload Receipt" button within the section, or you can click the "Upload Receipt" button in the upper right corner of the page.
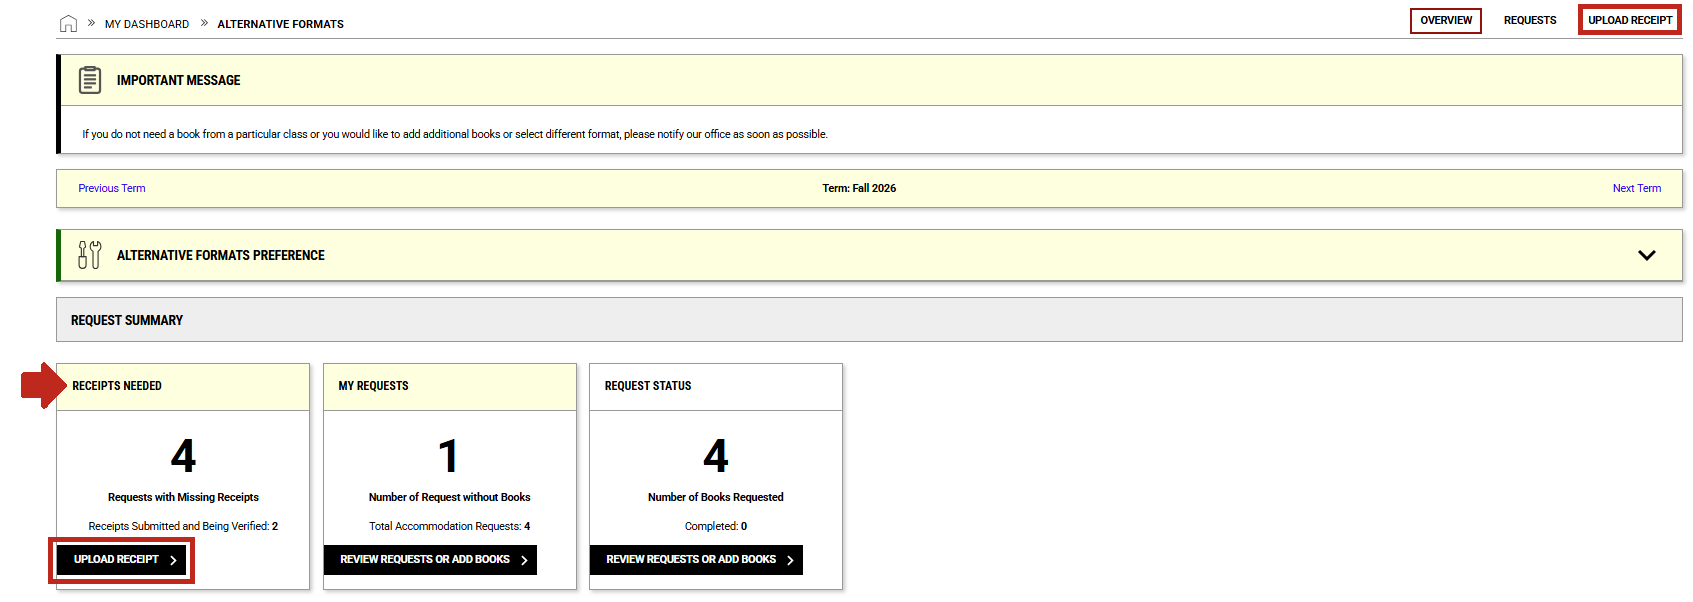
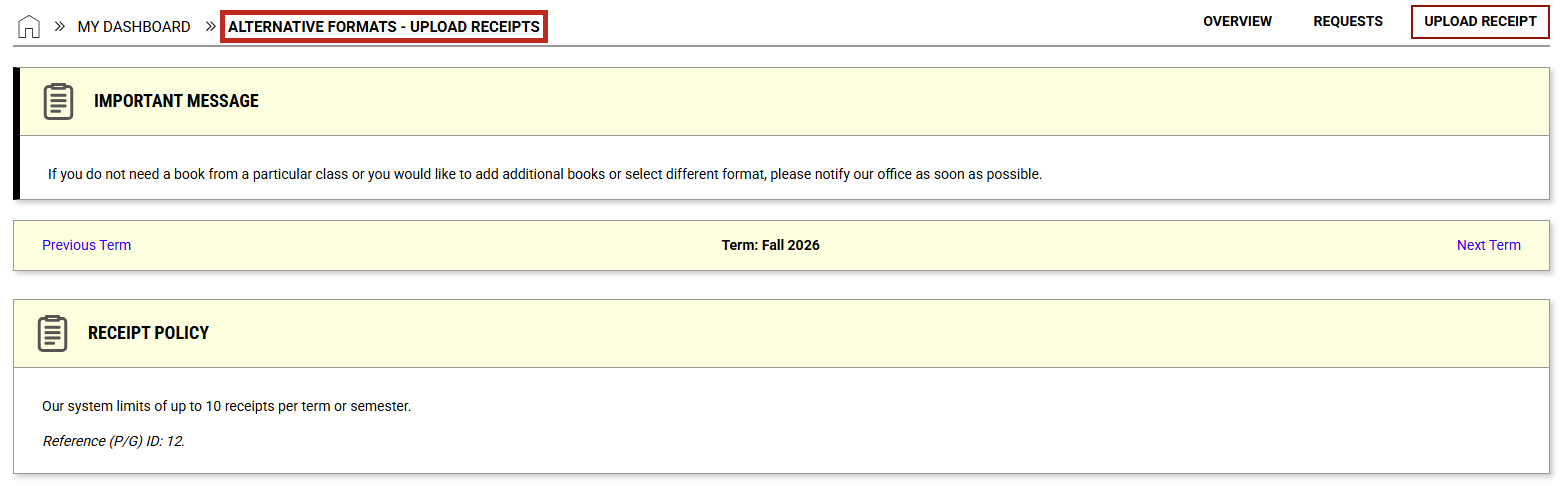
- This will take you to the "Alternative Formats -- Upload Receipts" page.
- Under the section "Books Without Receipt" shows a list of books that you have requested that you still need to upload a receipt for.
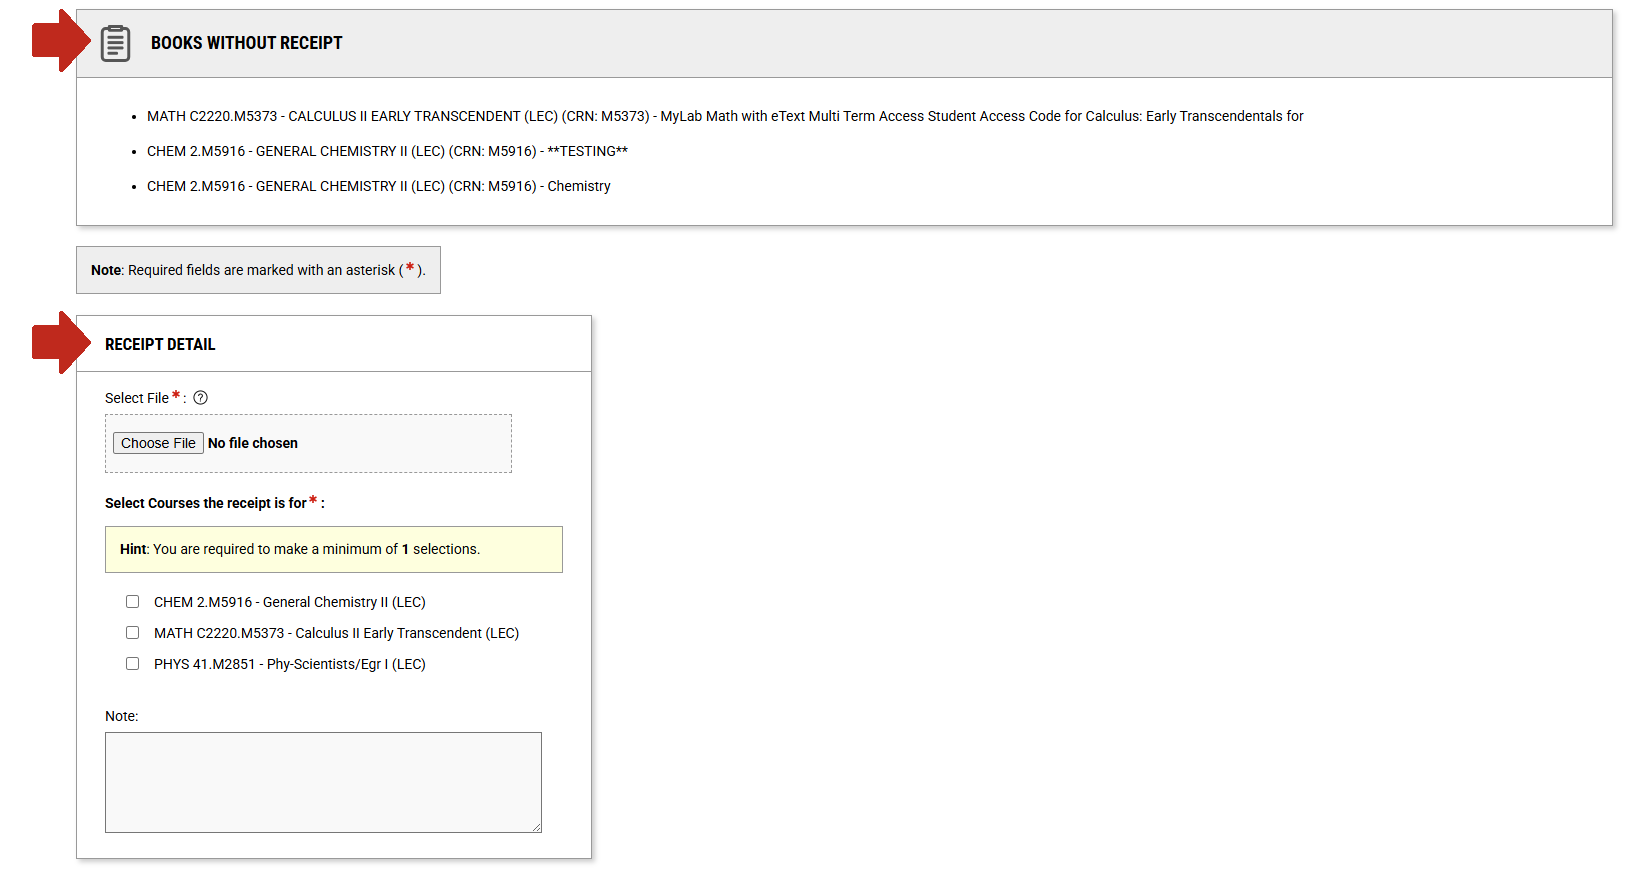
- The "Receipt Detail" section is where you will be attaching your receipt with information about the book that you are uploading the receipt for. Under "Select File:" click on the "Choose File" button and select the appropriate file to upload from your device.
- Under "Select Courses the Receipt is For:" is a list of classes with books and/or reading materials that you have requested alternative formats for. Select the class from the list that you are uploading the receipt for.
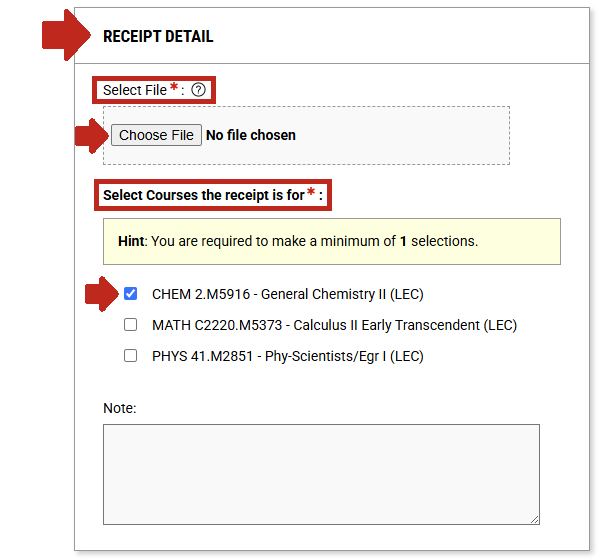 Once you have attached the receipt and selected the correct class, click the "Upload Receipt" button.
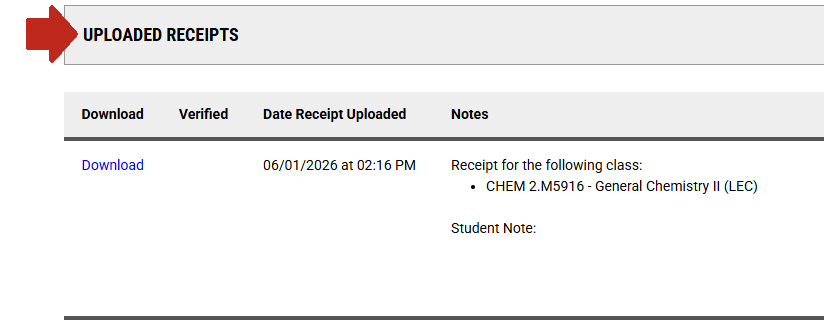
- After you have uploaded your receipt, a "Success! Your Action Has Been Completed" message will appear at the top of the page.
- The file that you uploaded will appear at the bottom of the page under a section titled, "Uploaded Receipts."
- Under the section "Books Without Receipt" shows a list of books that you have requested that you still need to upload a receipt for.
Contact Us
